
How To Replace A Broken Serpentine Belt
Not too long ago, cars used to have separate fan belts for each engine component and changing them was a total hassle. Nowadays though, most cars use a single serpentine belt (sometimes called an s-belt) that runs every engine accessory including the water pump, the compressor, and the alternator and changing it once it breaks is a breeze by comparison.
The serpentine belt is essential to your car working properly since so many systems depend on it. It’s highly recommended to regularly check your serpentine belt for signs of deterioration and replace it every 30,000 to 90,000 miles depending on the belt manufacturer.
Driving with a broken or damaged serpentine belt will cause your car to overheat and can cause the failure of other important components such as the alternator, air conditioning or power steering.
There is rarely a point in trying to fix or repair a broken serpentine belt since new ones are fairly inexpensive and easy to replace. If you find signs of damage on your s-belt, just follow the next steps to replace it

Get all the required tools and materials ready
Replacing a serpentine belt can be done using basic hand tools although more specialized but still fairly cheap solutions are also available. Before you begin the project, you’ll need to have ready:
A new serpentine belt – When you shop for your new serpentine belt, you’ll need to provide the make and model of your car, the engine size (if applicable, since some models have multiple engine sizes) and whether your car has air conditioning or not. You need to make sure that the s-belt you purchase has the exact same width and size as the existing one, but you’ll get the chance to double check this once you actually replace it.
Safety gloves and safety goggles – I think safety gloves are a must whenever you work on an engine, and although I know some people sometimes skip the safety goggles, I recommend having them just in case. When it comes to auto safety considerations, it’s better to be safe than sorry.
Socket set and ratchet – You probably have a ratchet set in your car or a socket set and that should be enough, since the only time you’ll actually need to use tools is when you release the tensioner.
Serpentine belt tool – This is actually optional, but it can save you a lot of time and effort since it makes releasing the tensioner and placing the new belt extremely easy. The serpentine belt tool comes with an assortment of sockets so you can use it for multiple types of cars, and it’s usually accompanied by a belt placement tool which makes placing the new belt easier.

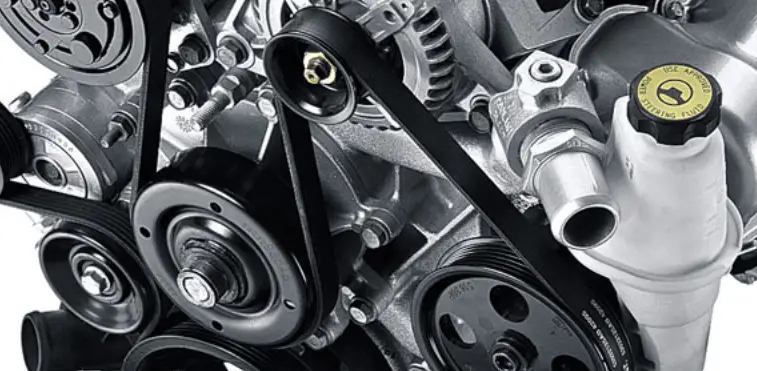
Locate the serpentine belt
Before you start working on the engine, make sure that your car is parked on a flat surface, with the brakes on, and the engine turned off. If you want to be really safe, you can disconnect your battery as well, although that’s not generally required.
Open your hood and try to remove any engine covers that may block your access to the front of the engine.
Take a look at the belt routing diagram which is usually displayed under the hood on a decal. If you can’t find it, please consult your car repair manual, or look online for your car’s belt routing diagram and print it.
It’s essential that you understand where your belt is located and how it wraps around the pulleys before continuing with the project.
Relieve the tension on the serpentine belt and remove it
Today’s automatic drive belt tensioners are very straightforward and make relieving the tension on the serpentine belt a simple, one-step process.
The auto-tensioners are usually designed with either a hole to fit a standard half-inch ratchet or a bolt so you can use a socket on.
Just locate the belt tensioner which keeps the belt secure, and using a wrench or a serpentine belt tool pull it in the opposite direction of the tension to release it. Depending on your particular engine, this can be either clockwise or counterclockwise but it should be very intuitive.
Once the tension is relieved, you should be able to easily pull off the belt and remove it from the pulleys.

Replace the old serpentine belt with the new one
Now it’s time to compare the old serpentine belt to the new one and ensure that you purchased the right model.
They should have the exact same width and number of ribs. The old belt can be slightly longer due to stretching, so if you find a small discrepancy in length, don’t worry as it’s perfectly normal.
If everything looks good, it’s time to route your new serpentine belt through the pulleys alongside the same path as your old one. Make sure that your belt is not contorted or tangled and that the belt ribs line up perfectly.
Once the new belt is installed, activate the belt tensioner using the same method you relieve it previously, either with a ratchet, socket or a serpentine belt tool.
The procedure is now complete and you should be able to start your engine and ensure that everything runs smoothly. If you follow our tutorial and have all materials ready beforehand, it should take you anywhere between 15 minutes to 1 hour to go through the whole project.
There are some engine models where replacing an existing serpentine belt requires removing an engine mount or there is limited space in the engine compartment making the process more difficult. Those situations are outside the scope of this tutorial, but generally, you need to elevate your engine using a jack stand and have access to a professional mechanical shop and professional tools.