
How to Remove Paint Transfer from Your Car
Scuffs and paint transfer can mysteriously come out of nowhere. While incredibly annoying, there’s absolutely no reason to get all worked up. In this piece, we’ll present you with a step-by-step guide on how you can remove paint transfer from your car.
Paint transfer or scuffs can be a headache if you don’t know how to remove it. With a car paint gun, you can conceal any blemishes once and for all. However, if you haven’t invested in a paint gun yet, or if the paint transfer is only on the outer wax coating, there’s no reason to lose hope just yet.
Fortunately, removing paint transfers is not a complicated process. By having the right scratch-removing products and following this brief guide, removing paint or scuff marks shouldn’t be too difficult for any car owner.
Here’s a quick rundown of all the tools and supplies you should have on hand:
- Pressure washer or garden hose
- Multiple microfiber cloths and soft-foam pads
- Turtle Wax Repair and Renew
- Turtle Wax I Spray Wax
- Optional: an orbital sander with a soft-foam attachment
But before you even think about going over the paint transfer with a scratch removal kit, make sure to park your car in a shaded area. Ideally, you should park your car indoors, so airborne debris doesn’t get trapped in the newly-applied scratch remover or wax sealant. Also, make sure your car is cool to the touch proceeding.
How to Remove Paint Transfer in 4 Steps
There are only four key steps in removing paint transfer: washing your car, removing the paint transfer, polishing the surface, and adding a protective wax coating.
1. Washing the car
Before you even begin to chip away at the paint transfer, give your car a quick wash. Neglecting this step might result in deeper scratches deep scratches on your car’s paintwork since we don’t know whether the paint transfer is only on the clear protective or even deeper.
First, we need to do a touchless wash. Using a pressure washer or garden hose, wash the paint transfer thoroughly until you’re confident all loose debris is out of the way. If you’re using a pressure washer, use the widest QC tip possible while standing a couple of feet away so as not to cause even more damage to your vehicle.
Feel free to use soap in this step. If the paint transfer has penetrated the protective outer coating, use a wax-stripping detergent like dishwashing soap.
After washing the paint transfer, use a clean microfiber towel and dry the area off completely. The surface of the paint transfer needs to be bone-dry before using a scratch removal kit.
2. Removing the paint transfer
When the paint transfer area is dry to the touch, we can begin applying the scratch remover. We wholeheartedly recommend that you use Turtle Wax Repair and Renew. This scratch remover works incredibly well at removing paint from your car’s protective sealant.
To use Turtle Wax Repair and Renew, add a few drops of the scratch remover onto a microfiber cloth. Go over the paint transfer with the microfiber cloth in a back and forth motion, only using slight pressure. Continue doing this for around 30 seconds.
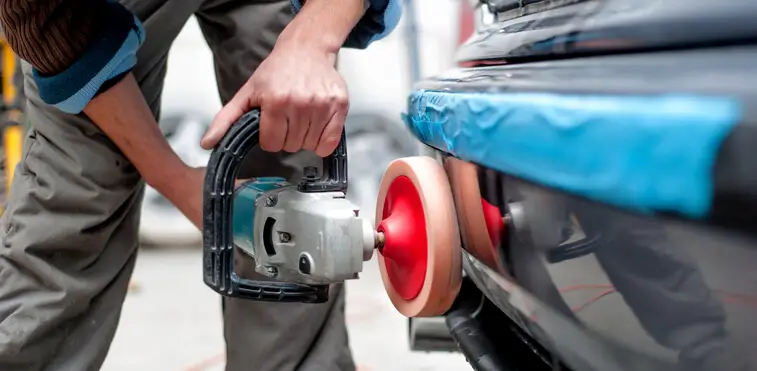
Alternatively, you can use an orbital sander with a soft-foam attachment. Drop a few splotches of the Turtle Wax onto the foam attachment, then run on the paint transfer area with slight pressure while moving the tool back and forth. Do this for up to 30 seconds.
Afterward, wipe the Turtle Wax away using a clean microfiber towel. Check to see how much more paint you need to remove. Repeat this process until the paint transfer is completely gone.
3. Polishing the surface
Since scratch removal kits can leave a dull finish on your car’s body, you might need to polish your car to restore its original shine. You can use any polish you like, but we’re extremely fond of Turtle Wax ICE Spray Wax. This product contains both a polishing agent and a wax sealant that restores your car’s original shine and protects it from future paint transfer incidents.
To use ICE Spray Wax, you can spray it directly onto your car or spray it onto a microfiber cloth or soft-foam pad. Apply the ICE Spray Wax in a back and forth motion with slight pressure for up to 30 seconds. Then, using a clean microfiber cloth, remove the residue to reveal your car’s shine. Repeat this step if necessary.
4. Adding a protective wax coating
If you used Turtle Wax Ice Spray Wax, you could forgo this step altogether. If you used another wax product that doesn’t add a protective coating, now’s the time to use your go-to brand of car wax.
In this final step, the goal is to restore the car’s shine to its pre-paint-transfer days. The wax not only produces a similar shine to brand-new vehicles, but it also adds an invisible protective layer that can stop future paint transfer incidents from ruining your car’s paintwork.
To do this, take a can of your favorite brand of wax coating and apply it to your car’s body. Using a microfiber cloth or soft-foam pad, apply the wax in a swirling motion and let it sit for a couple of minutes. Finally, remove the wax with a clean microfiber cloth, and you’re all done.
Last Words
And that’s how you remove car paint transfers from your cars, ladies and gentlemen. In most cases, you can remove paint transfers by applying a scratch remover. Only in the most extreme cases will you need to actually redo the paintwork with a car/automotive paint gun.
In this guide, we’ve provided you with an easy-to-follow, four-step technique on removing paint transfer once and for all. The four steps you need to removal the paint transfer are washing your car, applying a scratch remover, applying polish, and adding a protective coating of wax. Turtle Wax Repair and Renew will help remove unsightly paint transfers and scruffs while Turtle Wax Ice Spray Wax coats your car in a scratch-proof layer.