
A Simple Guide on How You Can DIY Paint Your Car
Throughout your car’s life, it will have many scratches and dinks. The more you drive, the bigger the possibility of damaging the paint job. Now over its lifetime, you are bound to do some work on the paint.
Paint is easily chipped off, or sometimes due to adverse weather conditions, it can wear out. For that, you need to repaint your car, right? You need to look at a few things to ensure a perfect paint job. Whether you go to a shop for the paint job or decide to do it on your own, you do need to make sure that you know the car paint code.
Oftentimes you can find the paint code through the make of a car. So that makes it easier for you to find the specific paint needed for your car model. Going to a shop and having the car painted can often become an expensive undertaking.
So many people choose to do it on their own. If you want to save some money or maybe need a fun project to work on at home, then you can paint your car by yourself. So for those who want to take up a personal project, this is for you. Here is a simple guide to how you can paint your own car. So let’s get into it.
What Are the Steps For Painting a Car?
So here are the steps that you need to follow to paint your car. Make sure you do these things properly; otherwise, you may face difficulty when going through the actual painting process. So let’s begin with the steps.
You need to prepare the workspace and all the supplies first. Remember to check for and fix rust spots. Sanding your car is very important. Also, you should determine the type of paint that needs to be used (i.e., automotive paint colors and codes or touch-up paint codes for your car).
Another important aspect is using thinners to wipe away all the dust from the car. You should master the spraying technique before actually working on the car, so you need to practice. Then priming comes. This is a major part of preparing your car, so make sure you do it.
You should be sanding your car once more for guaranteed smoothness. Always apply 3-4 coats of paint for the topcoat to ensure maximum coverage. Then you put the lacquer on the car. And don’t forget to buff the car with a buffer at the end.
Now each step has a bit more to it than this, so we are going to explain the steps in detail in the following passages.
First Step
So first up is Supplies and Preparation. Painting a car is hard work and requires a lot of time to complete. This is why you should prepare where you will work and ready supplies beforehand. So here are the basic items you need to have and the preparations you need to do. You can start out by gathering the things you need first. So you should make sure you have 1200- and 2000-grit wet-and-dry sandpaper, a powered sander, masking tape, and masking paper. On top of those, you should make sure you have other things. Like a spray gun, using a high-pressure air compressor, paint thinners, primer, an acrylic topcoat, clear-coat lacquer, and a buffer.
Also, don’t forget the face masks and safety glasses. So the amount of paint you need varies from car to car. But if you have a small to medium-sized car, then you will need around 1 gallon of primer, 3 gallons of topcoat, and 2-3 gallons of your clear coat.
But for larger vehicles, you may need around 1 ½ gallons of primer, 4 gallons of topcoat, and 3-4 gallons of clear coat. So whenever you are thinking about repainting the same as the original one, then you will need to match the paint code of the color.
If you are selecting a few areas, then you would need the touch-up paint code for your model. Just simply look it up online if you want. Now you need to prepare the workspace. Since this will take you a long time to finish, you should take the utmost care to get the workspace ready.
If you want a paint job that will have no blemishes, then you need to ensure that there is no dust or debris in the place where you will work. Fitting a shed with a dust excavator is best as it will remove everything, including dust and debris, from the workspace.
What would be best is if you could set up a paint booth specifically for the paint job. If you have to work under the open sky, then remember to check the weather. If it is not conducive to what you want to do, then you won’t be able to do it. Now, whatever you do, do not your car under trees.
Some Things to Watch Out For
One of the first things you should look for is rust. Often times rust kills the paint job. Now the best way to ward off the rust is to just cover your car in the garage. And if you have a slight rust problem, you can always sand the rust off.
But if the rust is heavy, then you need to treat and seal it before thinking about painting the car. Then you can move on to selecting the type of paint you need for your car. You can select from Waterborne paint and Solvent-borne paint.
So solvent-borne paint is basically the type that comes with a chemical-based like lacquer, enamel, or urethane. This makes the paint very volatile and a bit harmful to the environment.
This is why a lot of car owners are now choosing to work with waterborne paints as a green alternative. Remember, automotive paints are only for cars and are designed for cars. You should not use them anywhere else, nor should you use other paints in your car.
Second Step
Sanding is a very important part of the painting process. You need to sand down the body down to the metal. Make sure that no paint or coating is left behind. 2 hours per panel should be enough for this process.
Once you are done removing the paint, finish the sanding process with the wet-to-dry sandpaper. This will give you a smooth, even surface to work on, ensuring a clean and smooth paint job.
So remember to sand the body in a circle to ensure proper sanding; make sure you go into the tight spaces and sand those down by hand if you have to. Once you feel the sanding is perfect, then just simply wash the body with thinners to get rid of any lingering dust or other particles, then just wipe the entire thing with a clean cloth.
If you are looking to only paint parts of your car, remember to mask off the other parts and seclude the parts you need to sand; otherwise, you may damage other paint.
Third Step
So next up is priming your car. Before priming your car, however, you should be taking safety precautions. Remember those gloves, goggles, and masks? Yeah, now is when you will have to use them.
You don’t want these harmful chemicals getting into your system. So before you start painting, work on the technique on a piece of scrap metal. The best thing to do is to take the spray gun and start spraying side-to-side in a continuous motion, only pressing the spray gun trigger when you are moving.
You don’t want to spray on one spot because it would make for a blobby and uneven finish. Now, you obviously know that you need to apply some thinners to your primer before you start applying it. Don’t worry; you can easily find how much you need to mix on the paint cans. So start priming from the roof down.
Make sure you do it properly; you would need to do 2-3 coats for it to be properly done. Covering each panel will take you anywhere between 10-20 minutes, depending on your dexterity. Then you have to let the primer cure.
It can be anywhere from 20 minutes to an hour, depending on different primers. You will find the curing time on the can if you need a reference. Make sure you apply a new coat only when the older coat of primer has dried otherwise, it defeats the purpose.
After you are done with the priming, you need to sand the body again but this time, use the 2000-grit sandpaper. After that, take a little bit of thinner and a clean rag and wipe the car down. Do not use too much thinner because it will take off the entire primer layer, and you don’t want that.
Fourth Step
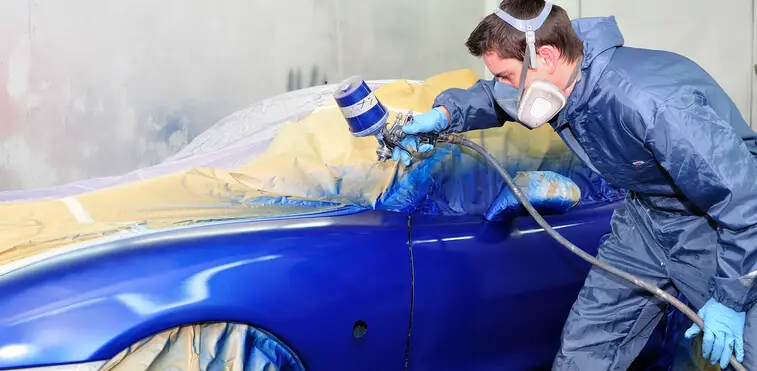
So painting the car is more or less the same thing as priming. So first, you need to apply the thinner for which the ratios will be listed on the can. Then apply the same spray gun technique when painting as you did with the primer.
Once done applying each layer, let the paint cure. The timing, too, should be similar to the primer. You need to make sure you apply at least 3-4 coats of paint for the topcoat to ensure full coverage and a smooth surface.
But you should sand down the body before the last pass with a topcoat, then wipe it down with a clean rag. Doing this will get rid of any powdery residue from the car, giving you a clean, smooth finish.
Fifth & Final Step
So here you again need to follow the steps of the painting or priming process. But this time you need to do this for only 1or 2 coats. While the clear coat is still wet you should remove the masking if you have any and then let it dry.
After the curing time is over and the clear coat is dry check for blemishes and uneven surfaces. If you find any blemishes, then just sand it down and lightly spray that area until you have a smooth finish. Then use a buffer to buff the final coat. Remember you cannot linger in one place for too long because it will create an uneven coating.
And You Are Done!
So this is how you can paint your own car. The process is labor-intensive I know but it is quite simple. You just need to be a bit vigilant by finding the paint code through the make of a car. After that, it is easier for you to find the specific paint required for your car model. Don’t worry if you cannot get a proper finish, even professionals have a hard time getting it perfect on the first try.
So just keep at it and remember attention to detail is key. With that being said our guide to painting your own car comes to an end. Give it a try and let us know in the comments below if you have painted your car or not. Till next time, see ya!