
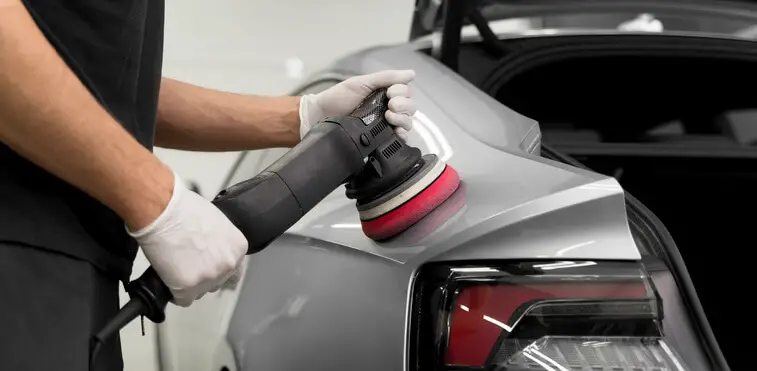
What Can Your Dual-Action Polisher Do For You?
We, car enthusiasts, mechanics, and car detailers alike, all have this handy-dandy tool hanging somewhere in our garage. We whip it out every now and then to make our car sparkling clean — but I bet you don’t know everything this marvelous tool can do for you. To help you get the most out of your tool, we’ve decided to come up with some of the best dual-action polishers tips we could find.
Enjoy!
Difference Between Dual-Action and Rotary
From the start, it’s essential to know what you have. Is it a rotary polisher or a dual-action polisher? How can you differentiate them from one another? Simple task, really — the motion of a dual-action polisher, also called an orbit polisher, makes all the hard work for you. Indeed, with a dual-action polisher, you can hold it steady, and the buffing pad will move in circles around its center axis. So, this is where its name comes from since there are two rotary centers to do whatever task you need it to do better and much faster.
As for a rotary polisher, also known as a circular polisher, the only rotating part is where the disc is situated, allowing you to be more precise. Still, you’ll need to keep the polisher moving to avoid creating hotspots.
Arguably so, the dual-action polisher is the best tool to use if you’re either a professional, an enthusiast, or a beginner. But of course, several variables will come into play here, including the type of pad you choose to use will matter in the end result. Make sure to look thoroughly at the operating instructions to ensure the best polish you could hope for.
Remove scratches
One of the many usages of the dual action polisher is removing scratches. This tool makes everything possible: removing scratches from a shopping cart bumping your vehicle, an angry ex keying your car, or a stone chip, as long as the paint is not damaged too deeply. In this case, you’d need a bit more than just a polishing job to make the scratch disappear.
So, what steps do you need to follow to succeed in this task, you ask? Here they are:
- Choose the proper polishing pad. This step is essential to achieve the expected result. Moreover, using the wrong pad could significantly increase the time it takes to do the job.
- Wash your car — and I mean a really thorough clean. A grain of sand thrown into the mix could scratch your car even more.
- Add the polish of your choice onto the pad and start moving in a circular motion. For more details on how to remove big scratches, have a look here.
Apply wax
What could be more appealing than a freshly waxed car on a sunny day? For that, your orbit polisher will do the perfect job. As for the kind of wax you should use, it’s really a question of personal preference, but I would highly suggest considering an environmentally-friendly solution — but of course, that’s really up to you.
That being said, once that primordial step is done, you can follow these:
- Even if you didn’t have to remove scratches from your car first, step 2 is still a priority. So, stop reading, wash your vehicle, and remove every tiny piece of dirt, rock, or bird poop you can or can’t see. Doing so will ensure that your wax job will be as smooth as a baby’s butt.
- Once your vehicle is all cleaned up, you need to choose the right pad for the effect you want.
- Apply a small amount of wax at a time and start the tool. You need to add wax frequently to ensure complete coverage of the vehicle.
- Move in a circular motion to ensure you don’t stay in the same spot too long (we’ll explain why a little later).
- At last, if the wax texture seems hazy, you’ve done it right. Simply pass over it with a microfiber cloth.
- Stand aside and admire the sun reflecting on your sparkling paint job — it’s as simple as that!
Get Rid of Paint Oxidation
How can oxidization happen on a car, you’ll ask? Well, oxidation is when your car paint loses its shine and starts to break down when hit by the sun. It’s a normal process; although it’s not elegant on your hood or roof, it ages your vehicle. Depending on the amount of oxidation you have, getting the job done by a pro may cost you anywhere from 150 to 800$. The good news is you can do it yourself and elevate the look of your car with an orbit polisher at a fraction of the price.
Simply follow these simple steps:
- Wash your car thoroughly, and make sure it’s sparkling clean first. A grain of sand could get stuck in the pad and scratch your vehicle even more.
- If your car has ample oxidization on several parts, you’ll need to do them one by one. Start by choosing one and tape the surrounding pieces of plastic and chrome.
- When buffing the oxidized spot, start with the roughest compound grade and work your way up. Don’t forget to constantly move around and never stay in the same place for too long.
- Once you’re satisfied with your buffing job, polish and wax your car completely.
- That’s it!
Things to Be Careful Of
As we’ve said, the best asset of a dual-action polisher is its double-axis rotating motor. However, that also means it can be hard on your paint job. Stay in one place for too long, and it will do more damage than good. So, the best way to eliminate this struggle is to move constantly; even though the purpose of the dual axis is to reduce the motion of your arm, staying static will burn out your paint.
Last Words
There you go! These were our best dual-action polisher tips right here! All that is left is to buy the right product for the job.
Nonetheless, keep in mind that not all vehicles will need to work out oxidization, but most will need a wax job once in a while. Luckily, it’s pretty straightforward; just remember to move circularly even though the orbit polisher seems to move for you; staying static for too long will ruin the effect your looking for and may even make it worse.
Get to work now and make that car shine bright!